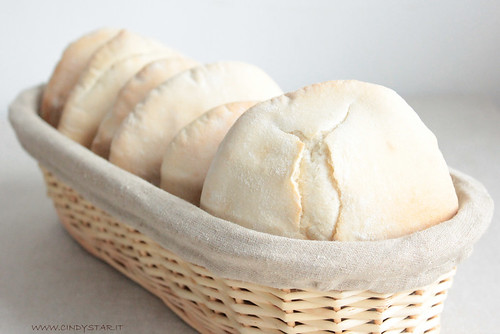
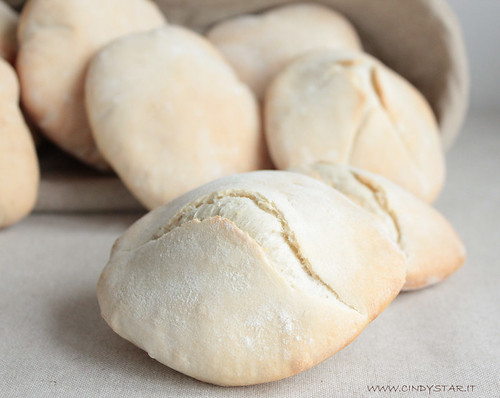
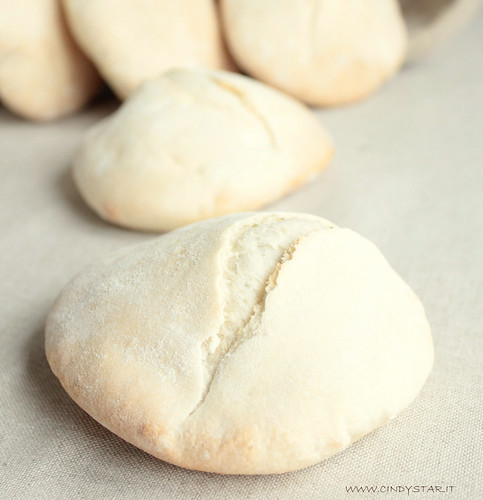
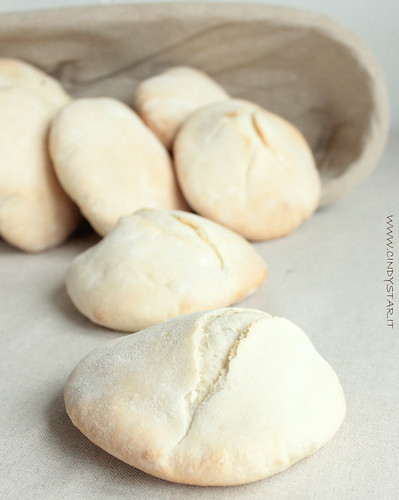
Pane Pita - Pita Bread
Tra poco atterrerò (virtualmente parlando) nella terra delle Piramidi per seguire Joan e il suo Tour Culinario Finale. Ho preparato i Falafel (polpettine fritte tipiche del mondo arabo, fatte coi ceci, in Egitto fatte con le fave), ma prima di friggerli ho bisogno di qualche pita da imbottire e gustare insieme. Ecco allora una delle primissime ricette da me seguite ai vari corsi delle mitiche sorelle, facilissima e direi anche velocissima da eseguire. Il risultato sarà come sempre eccezionale, ogni loro ricetta è una garanzia assicurata, la farcitura resta a proprio piacere e gusto.
Ingredienti per 8 pita:
500 g. di farina 0
300 g. di acqua tiepida
20 g. di lievito di birra
2 cucchiaini non colmi di sale
300 g. di acqua tiepida
20 g. di lievito di birra
2 cucchiaini non colmi di sale
- In una ciotola sciogliere il lievito con metà acqua, unire un terzo della farina, battere e unire il sale, poi aggiungere la rimanente farina alternandola all’acqua, sempre battendo. Rovesciare sul tavolo infarinato e lavorare battendo per 8/10 minuti fino a quando l’impasto sarà liscio ed elastico. Se necessario unire ancora un pochino di farina.
- Nell'impastatore: mettere la farina nella ciotola, sciogliere il lievito nell'acqua ed aggiungerla poco alla volta mentre la macchina impasta. Aggiungere il sale alla fine ed impastare per circa 10 minuti, finchè l'impasto sarà liscio ed elastico.
- Dividere l'impasto in 8 parti uguali, fare delle palline lisce e ben chiuse sotto, appiattirle tonde col matterello fino ad avere un diametro di 12/14cm. circa. Se si attaccano sul piano di lavoro tirarle su di un canovaccio leggermente infarinato (attenzione che non "profumino" di detersivo, il pane ne assorbirebbe facilmente l'odore rovinandone il sapore).Coprirle e farle lievitare 30/40 minuti (per la sequenza fotografica passo passo della ricetta cliccate questo link).
- Scaldare il forno a 250° con la teglia dentro, estrarre poi la teglia bollente (attenzione a non scottarsi!) ed adagiarvi i panini, rimettere in forno e cuocere 10 minuti finchè saranno leggermente dorate.
- Mettere subito i panini belli gonfi in un sacchetto di carta e poi in uno di plastica per una mezz’oretta, questo per trattenere tutta l’umidità (infatti poi il sacchetto di carta sarà leggermente bagnato), altrimenti se lasciati all’aria si seccano e quando si aprono tendono a sbriciolarsi.
- Servire tagliandoli a metà e allargando la tasca con le dita per farcire a piacere.

I will be landing (virtually speaking) to Pyramides in a few hours to follow Joan and her Final Culinary Tour. I prepared Falafel (fried vegballs usually made with chickpeas and very popular in arabian countries, but in Egypt made with fava beans), but before I start frying I need some pita bread to enjoy together. Here below is one of the first recipes I have followed in Simili sisters' cooking classes, and I would say easy and fast to prepare. The result is exceptional, each recipe of these charming ladies is a guarantee, the stuffing then at your own pleasure and taste.
- Nell'impastatore: mettere la farina nella ciotola, sciogliere il lievito nell'acqua ed aggiungerla poco alla volta mentre la macchina impasta. Aggiungere il sale alla fine ed impastare per circa 10 minuti, finchè l'impasto sarà liscio ed elastico.
- Dividere l'impasto in 8 parti uguali, fare delle palline lisce e ben chiuse sotto, appiattirle tonde col matterello fino ad avere un diametro di 12/14cm. circa. Se si attaccano sul piano di lavoro tirarle su di un canovaccio leggermente infarinato (attenzione che non "profumino" di detersivo, il pane ne assorbirebbe facilmente l'odore rovinandone il sapore).Coprirle e farle lievitare 30/40 minuti (per la sequenza fotografica passo passo della ricetta cliccate questo link).
- Scaldare il forno a 250° con la teglia dentro, estrarre poi la teglia bollente (attenzione a non scottarsi!) ed adagiarvi i panini, rimettere in forno e cuocere 10 minuti finchè saranno leggermente dorate.
- Mettere subito i panini belli gonfi in un sacchetto di carta e poi in uno di plastica per una mezz’oretta, questo per trattenere tutta l’umidità (infatti poi il sacchetto di carta sarà leggermente bagnato), altrimenti se lasciati all’aria si seccano e quando si aprono tendono a sbriciolarsi.
- Servire tagliandoli a metà e allargando la tasca con le dita per farcire a piacere.

Questa ricetta partecipa all'Abbecedario Culinario Mondiale per la tappa in Egitto, ospitata della cara Terry.
Pita Bread
I will be landing (virtually speaking) to Pyramides in a few hours to follow Joan and her Final Culinary Tour. I prepared Falafel (fried vegballs usually made with chickpeas and very popular in arabian countries, but in Egypt made with fava beans), but before I start frying I need some pita bread to enjoy together. Here below is one of the first recipes I have followed in Simili sisters' cooking classes, and I would say easy and fast to prepare. The result is exceptional, each recipe of these charming ladies is a guarantee, the stuffing then at your own pleasure and taste.
Making 8 pita:
500 g. flour
300 g. warm water
20 g. fresh yeast
about 2 teaspoons salt
500 g. flour
300 g. warm water
20 g. fresh yeast
about 2 teaspoons salt
- In a bowl dissolve the yeast with half water, add one third of the flour, add salt and beat, then add the remaining flour, alternating water, still beating. Turn out on floured working surface and knead for 8/10 minutes until the dough is smooth and elastic. If necessary add a little more flour.
- In the Kneader: pour the flour into the bowl, dissolve yeast in water and add it little by little while the kneader is working. Add salt at the end and knead for about 10 minutes, until the dough is smooth and elastic.
- Divide the dough into 8 equal pieces, shape into balls and using a rolling pin flatten round to 12/14cm. diameter. If you prefer you can roll on a lightly floured kitchen towel (but be careful it does not "smell" of detergent, the bread would easily absorb the smell and the taste could change.) Cover and allow to rise 30/40 minutes (follow this link to see step-by-step slideshow recipe).
- Preheat oven to 250° (with baking tray inside the oven), then remove the pan (be careful not to burn yourself!) and arrange pita buns, put back in the oven and bake 10 minutes until they turn lightly golden.
- Put immediately the puffy buns in a paper bag and then in a plastic one for half an hour, in this way all the moisture will be retained (in fact then the paper bag will be slightly wet), otherwise if you let the pitas cool down on a rack they will dry and break when cut.
- Serve cut in half and enlarging the pocket with your fingers to stuff as you like.


15 commenti:
Che bello questo pane, anche io oggi cucino egiziano, stasera arriva il post. Bacioni Kri
Che bei pani!!!
Dici che si possono fare anche con la p.m???
Buon pomeriggio, baci!
che bellezza questo pane!! e che belle foto Cinzia! Brava, davvero brava..
un abbraccio
complimenti per questo meraviglioso pane! stupendo e fragrante!
Kri, e cosa prepari di bello? ... quasi quasi mi metto anche il caftano stasera ... pizza e falafel, sembrerà di stare in una kebaberia!
Simo, credo proprio di sì, però deve essere bella arzilla, magari con più rinfreschi ravvicinati, altrimenti ho paura che non basti per farli gonfiare bene. Eventualmente si possono fare con la p.m. aggiungendo un pizzico di lievito (2 o 3 g.) per dargli la spinta iniziale nella lievitatura.
Manu, ripresa dalle fatiche di I.G.? ... sto anche andando ad un corso di fotografia, ma ancora non vengono come vorrei, faccio tanta confusione! ... menomale che la macchina rende bene!
Valeria, grazie, non me lo ricordavo neanche io così facile e veloce, bisognerebbe sempre riprendere in mano le vecchie ricette ...
che delizia, vene voglia di mangiarlo, bravissima!!!
Che candore queste foto... un incanto... come il pane, del resto: semplice, caldo, buono.
foto bellissime--- che voglia di pita che mi hai fatto venire...
meno male che mi sono "strafogata" altrimenti sarei catapultata in cucina per prepararle!
notte
Vero
mi sono ripresa, assolutamente :P
hai fatto tantissimi progressi però con la fotografia, davvero, grande! :)
complimenti per il tuo blog, è bellissimo! mi iscrivo così ti seguo sempre! se ti va sei la benvenuta nella mia cucina! un bacione! :-D
Colombina, grazie, è stato letteralmente fucilato, ma ne farò sicuramente ancora.
Vincent, grazie della cominicazione, verrò a trovarvi presto.
Mela, grazie, non volevoinfatti aggiungere niente più che potesse distogliere l'attenzione dalla purezza del pane, brava a coglierne l'esatto proposito.
Vero, in effetti meglio trovare un orario migliore per panificare!
Manu, grazie, da te è un supercomplimento! :-)
Dada, grazie mille, vengo a trovarti prestissimo!
Che panini deliziosi! Solo a guardarli mi viene l'acquolina in bocca!!! Stampo subito la tua ricetta! Grazie!
More, e vai sul sicuro con questa ricetta, le Simili sono una super garanzia, credimi!
Che bello il tuo pita! ...le Simili sono infallibili! ;)
Grazie, Terry, ricette supercollaudate e fidatissime sempre ;-)
Posta un commento
grazie della visita e gentilmente firma sempre i tuoi commenti!
thanks for passing by and please sign up your comments!